
See how it puffs up a little? More so than with vegetable shortening.
In making this–though I say it myself–dazzling lattice raspberry pie, I am standing on the shoulders (metaphorically) of a long line of matriarchs. Here are three.
My mother-in-law (and actually my father-in-law too) always made pies with lard instead of with shortening. I can remember going to the grocery store and having to hunt around for lard for them to make their pies, because for many years it was not popular. Now, people are starting to realize that emulsified seed oils may actually be as bad or worse for us than animal fat, and so people like me are starting to use lard for the first time in our lives. It gives the pie crust dough a bit more of a taste than shortening, which is a tiny bit off-putting to someone who is used to shortening pies … but in the finished product, the taste is more buttery.
While I tell you about the matriarchs, here are the steps for making a lattice pie, learned long ago from the Better Homes & Gardens cookbook.
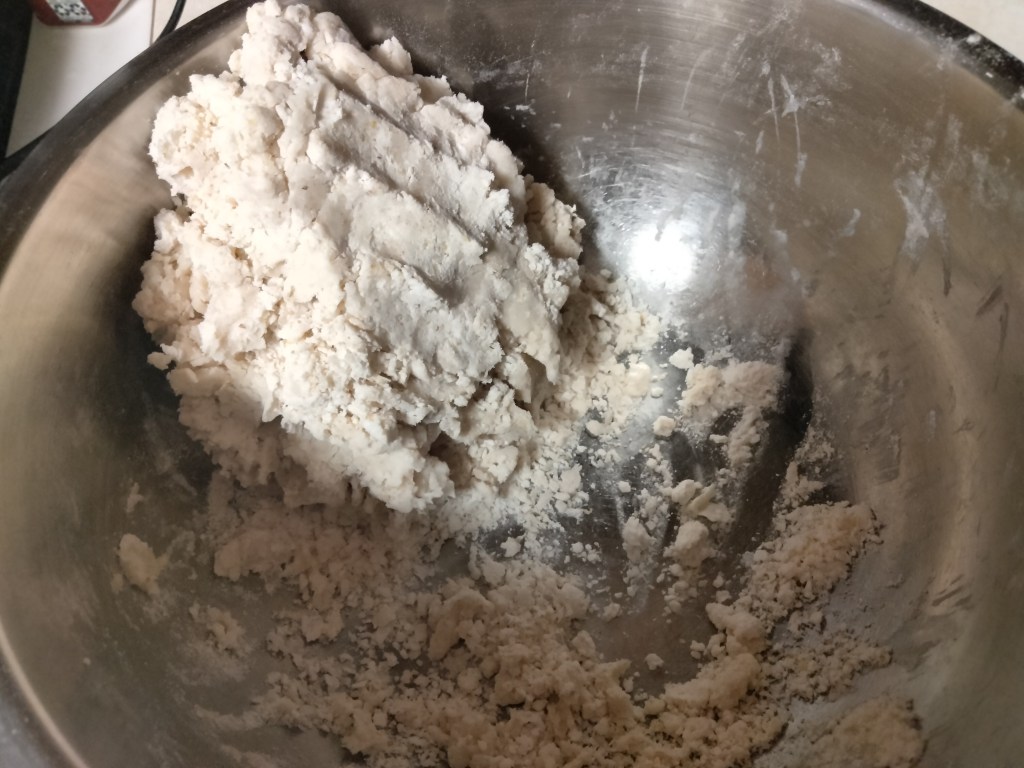
First, cut the lard into the flour and then slowly mix in cold water, enough to make a double-crust pie.
Roll out the bottom crust, transfer to the pie pan by loosely wrapping it around the rolling pin, patch cracks, and fill it with whatever fruit you are using. In my case, it’s raspberries picked from our patch, tossed with sugar, cornstarch and a dash of cinnamon.
Next matriarch: A cheerful saint at my church in Ohio, who had home schooled five children. Once I went to Sunday dinner at her house. She referred to her ability to get a full dinner on the table within an hour of getting home from church as “the forty-minute miracle.” She also told me this:
“When I first got married and started cooking meals, I thought that over time, I would become a gourmet cook. That didn’t happen, but what happened was that I got faster.”
Me too, Ruth. Me too. You get faster, which makes things easier, but unfortunately you only get faster at the things you actually practice.
On to the lattice.
Roll out the second half of the pie crust dough and cut it into strips, like this:
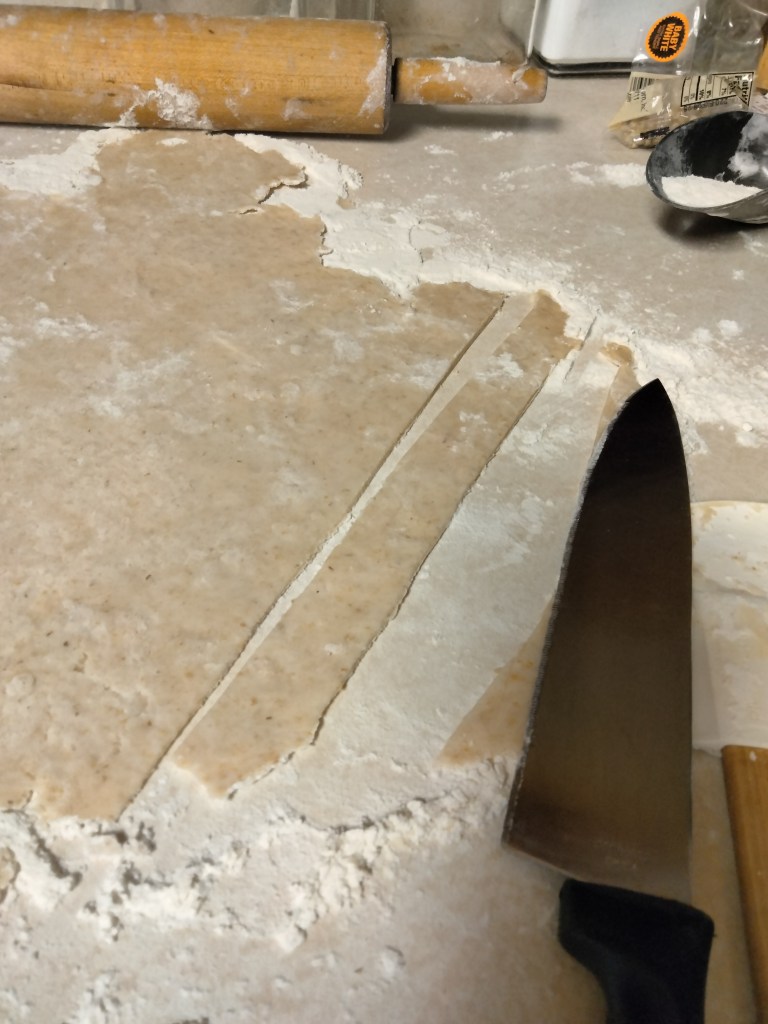
I don’t cut all my strips beforehand. I just make them as I go.
Take a shorter strip and put it across one side of the pie. Take another short strip and put it down at a right angle, so they cross.
And now, the magic happens.
As you add strips, you will need to gently fold back the ones that you want to go over the new strip. Here I am lifting one, to illustrate.

As you add new strips going at right angles to each other, keep folding back every other strip when you place a new one. Then put them back after the new strip has been placed. That’s how you get a weaving effect.

Like this.

The last matriarch I have to thank is whoever planted the large raspberry patch in the yard of the farmhouse we rent. It was probably the older farmer and his wife we rent from. By the time we got here, the bushes were already producing, keeping me busy picking throughout July.

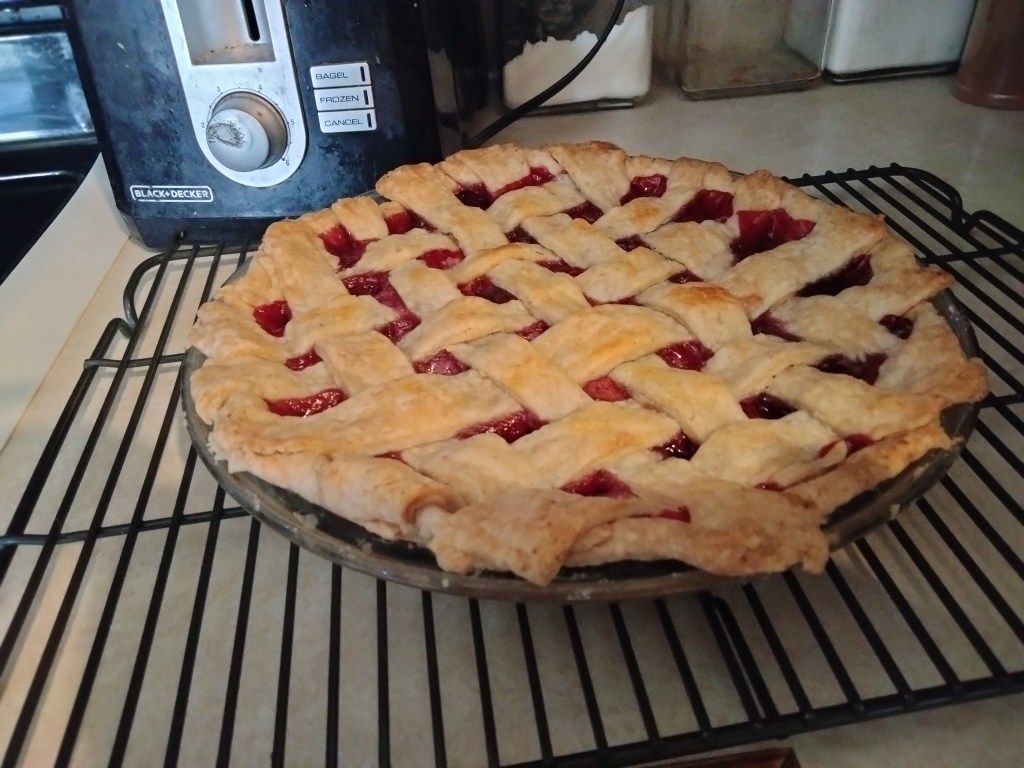
All ready! Scatter small pieces of butter over the crust and put aluminum foil around the edge for the first 25 minutes of baking. Don’t forget to put a baking sheet on the rack underneath the pie. If you have done this right, molten raspberry juice will bubble out, and your smoke alarm will go off. You want the raspberry napalm to fall and burn onto the baking sheet, not the bottom of your oven.
Enjoy!

That looks absolutely delightful!!! What a treat!!
LikeLiked by 1 person
Aw thanks!
LikeLiked by 1 person